Friday, 17 April 2015

Knitting Fever


Hi everyone,

The weekend is here...feeling happy!

Wanted to dedicate this post only to knitting, so here it is...

My mother was an experienced knitter. I learned knitting from her at the age of ten. I used to make dresses and caps for my dolls. Eventually, I lost interest as it was time consuming (for me :-( ). But after my delivery the craze for making woolens for my baby made me knit again. I made a few sweaters, pants, caps and booties.
 

I was somehow not satisfied with the outcomes. I started searching for patterns online and ended up learning crochet and had been crocheting ever since. It is my mother-in-law, who taught me the basics of crochet; I’m very thankful to her.

After moving to Boston I started knitting again. May be because of the cold weather I feel like knitting all the time. I knitted caps, mitts, and cowls as these are easy to make and takes less time to finish.


After I gained little experience I was courageous enough to start a sweater for myself. I chose a simple and easy pattern from Ravelry. It was fun knitting the pullover. The name of the pattern is 'Driftwood' by Isabel Kraemer.


My grey knitted pullover is loose fitted but very comfortable and on top of that it looks stylish. I love wearing it…….it is perfect for spring due to the stitch pattern. I saw Zoe Hart from “Hart of Dixie” wearing a loose fitted grey pullover lounging in her living room in one of the episodes. I really liked it and decided to make for myself. And then I saw the ‘Santorini Blue’ jumper pattern by DROPS Design, I was happy to find the pattern. The pattern is very simple, easy to follow and surprisingly, I finished it in no time.


I was using all my mother’s knitting needles, never felt the necessity to buy because I wasn’t so much into knitting until recently, when my sister gifted me three different sets of circular needles. This could be another reason for my knitting frenzy :-).

Presently, along with other WIP projects I have started knitting a shrug.


Happy Knitting!


Wednesday, 15 April 2015

Crocheted Necklace Pattern

  Hello everyone!

A very good morning to all of you. 

Last night I finished writing the pattern of Blooming Flower crochet necklace. I don't know the proper way of writing patterns, there may be some mistakes. So, please let me know if you face any issues.


Blooming Flower Crochet Necklace


Materials:
·         90 cm ribbon
·         Plastic Beads (27 approx)
·         Cotton for stuffing
·         Thread Aunt Lydia’s Crochet Cotton Size 10
·         Hook -1.5 mm

Instructions:

Flower:


The image shows 6 petals, you can make 7 or 8 petals by increasing the single crochet (sc) around the 8 ch round. For 7 petals sc 14 times and for 8 petals sc 16 times….rest is all the same.
Sew the plastic beads on top of the flowers.


Bead:


Row 1: Make a magic ring and make 6 sc over the loop. Pull the tail to make a tightly closed ring and make a slip stitch with the first sc.

  • Take the ribbon, after about 30 cm make a knot. Pull the ribbon through the magic ring hole and continue making the bead.

Row 2: 2sc in each of the 6 sc  - 12sts


Row 3: *Sc in one st and 2 sc in next st* ** repeat till the end – 18 sts (you are increasing 1 st at every second st)

Row 4: *Sc in each of 2 sts and 2 sc in next st* ** repeat till the end – 24 sts (you are increasing 1 st at every third st)

Sc across for next 3 rounds (Row 5, 6, & 7)


  • Now fill it with cotton and start decreasing

Row 8: *Sc in each of 2 sts and next 2 sc together* ** repeat till the end – 18 sts


Row 9: *Sc in one st and next 2 sc together * ** repeat till the end – 12 sts


  • Now fill it up with cotton, keeping the ribbon in the center

Row 10: 2 sc together around – 6sts


  • Now cut the yarn leaving a long tail. Take a tapestry needle and sew through all the 6 sc round the ribbon. Make a knot in the ribbon
 
Repeat entire procedure from Row 1 till making the knot for 4 more times. Now sew the flowers to the ribbon as shown in the image.


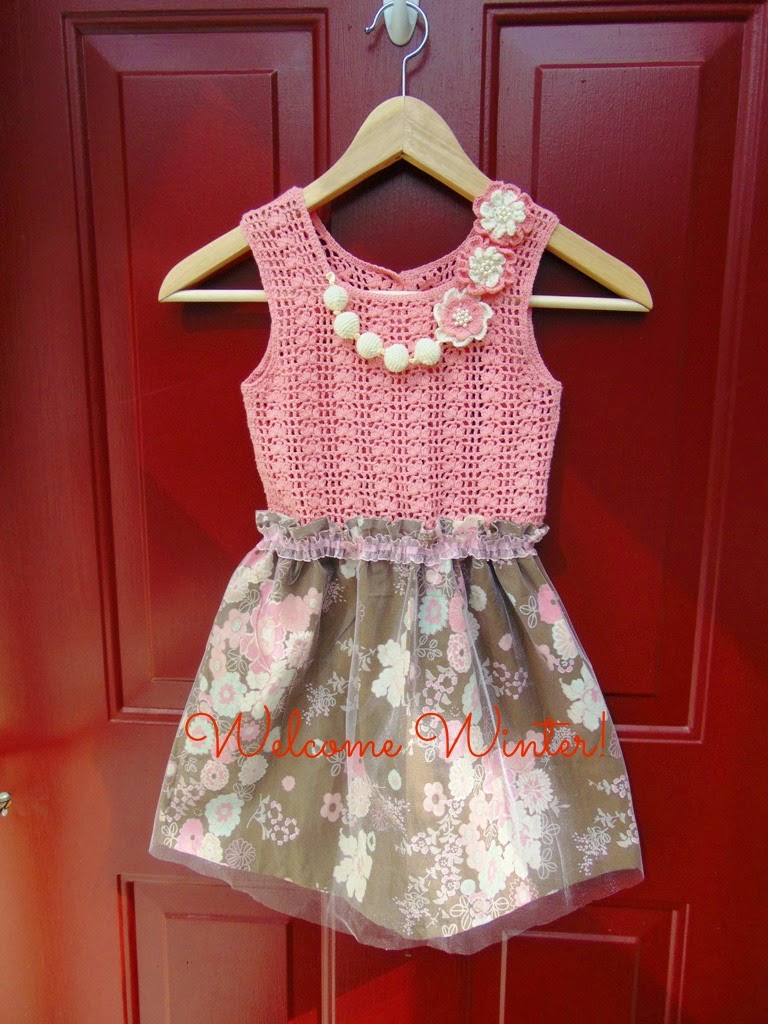
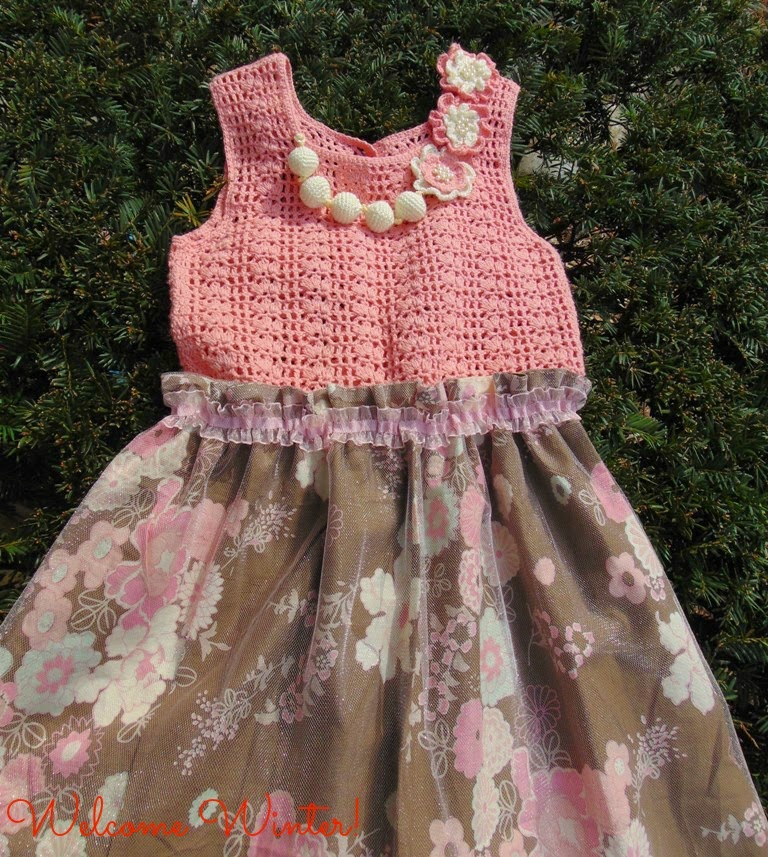
Your necklace is ready to wear… :-) You can also sew it to a dress as embellishment as I have done. 


 You'll find the pattern for the dress here.

You can download the PDF file for the pattern of this necklace here.

Happy Crocheting


Sunday, 12 April 2015

Crochet for Bihu

Hello everyone,

Feeling happy...

Lots of activities this month...Bihu, our trip to Orlando and our anniversary :-)

I'm from a place where we celebrate new year in April, which is called Bihu. We Assamese of Boston are going to celebrate it on 18th of April. Planning to wear our traditional dress, mekhla sador. Wanted a potli bag to go with my attire but I didn't have any. Thought it would be better to make one. So, here it is...


I had left over fabric from the blouse, so I used it for the lining of the bag.


I used the beads from an old necklace for this...


And, I made a lovely crochet blouse for my princess Tia to wear with our traditional dress, mekhla sador for the Bihu function.


I bought a mekhla sador set for my daughter from Assam before relocating to US but could not get the blouse. And without a blouse the attire is not complete. So, I made this blouse for her....it fits her beautifully. I'm very happy that she can finally wear it.


Wish you all a very Happy Bihu!
Jaapi

I'm also very excited about our Orlando trip. We'll be celebrating our wedding anniversary there. Looking forward to the trip.


Wednesday, 8 April 2015

Small Crochet Projects

Hello Fellow Crafters,

Hope all of you are in great health. I had a great day, my daughter's (Tia) interview for Kindergarten went well.

I was making a stuffed crochet flower few days back which Tia liked very much. So, I turned it into a hairband to cheer her up. I gave it to her after the interview and she was very happy.


Sometimes I get bored working on the same project for a long time. So, in between the big projects I like to take up small ones because it gives me a sense of accomplishment in less time :-) and revives my energy too.


I made this yoke using Romanian Point Lace (RPL). RPL is a combination of crocheting and needle work. I have not done any big project using this technique but I surely want to. A few other small projects similar to this one are in my mind...lets see when I can start :-).  Learn more about RPL here. Some of the blogs where you can find RPL patterns and tutorials are:

Cute flowers in the making...


While I was making crochet beads for a different project, I did some miscalculation and the beads turned out like tiny pitchers.


It looked like the lower part of flower, so I added the petals and made it into flower and attached stem to it. Also, made a few buds to feel spring because it is already spring but still haven't seen a single flower, not even leaves.


Some more flowers...


If you want the pattern for the flowers then please leave me a message or you can send me a mail, I'll get back to you.


Thursday, 2 April 2015

Blooming Flower Crochet Sundress

Hello everyone!

Wish you all a very good morning. It's is a beautiful day :-)


Blooming Flower Crochet Sundress completed right in time


Last month, I shared with you my WIP: a Crochet Sundress. I finally finished it right in time (it's still cold though, Tia, my princess, will have to wait for some more time). I took a little longer to finish the dress as I don't have a sewing machine and I had to hand sew it.

Crochet and Fabric Sundress


As in my previous post, I promised that I'll share the pattern, so, here it is:

Measurements:
  • Chest: 13"
  • Waist: 13"
  • Full length: 26"
  • Skirt: 13" (+ 1" for the frill)

Front Bodice

Front Measurements

Back

Neck & arm band

Button Band
I've discussed about the design and stitch in my previous post. You can refer to that for the sizing, yarn I used, hook, etc. It should fit a 5-6 years old girl. I made it for my daughter who is 5 years old. This is all about the crocheted part. Regarding the fabric part, I can give you an idea...


For the skirt, I used two layers: fabric & net (L-14" x B-45"). Sew the fabric and the net and attach to the crocheted bodice.

There may be a few mistakes, please let me know if you come across. I'll try to rectify and get back to you with the corrections. I've never written any pattern ... this is all I've noted down while creating the dress. Most of my friends keep asking me for patterns and I could never give them any...this one's for all of you.


I have not written the pattern for the flowers and the beads yet.....will post the pattern as soon as I finish writing it.
Hope you all like it....keep coming back and leave me a message. I'll be posting a lot of patterns.

Be happy and keep crocheting,
Aman